Saturday, 21 September 2013

One Chicken, Three Meals

I know chicken can sound boring, but it is inexpensive and flexible. Also, chicken, though not a totally environmentally-friendly source of protein, is generally speaking the "most green" meat choice at the grocery store. Ensuring however, that a chicken was humanely raised and slaughtered is a virtually impossible task on Saipan. So, unless your neighbor grows happy chickens and wants to sell you one at slaughter time, the provenance of the chicken from the grocery store will remain a mystery.

My favorite part about buying a whole chicken is knowing that I can use every part of it for something and I will have a week's worth of dinners ahead. So, enough blathering. Here it is.

                           Brined and Roasted Chicken

Brining a chicken ensures it will stay moist and tasty. It's also a great way to save that freezer-burned turkey you found at Joeten for thanksgiving.  Roast with "sturdy" root vegetables that can stand the long roast time. 

Brine 
Adapted from Thomas Keller's recipe in "Ad Hoc"
These measurements are approximate and you can add pretty much whatever you want to the brine.

I use a big bowl or a big plastic pitcher depending on the size of the bird. To make sure I make the right amount of brine, I put the thawed bird (minus the organs and neck) into the container I will be using. Then I fill it up with water so the chicken is submerged. It helps to measure how much water you put in as you go along, so you can get the salt proportion right. Remove the bird from the water and set aside on a plate. Wash hands and according to the below ratio, add the rest of the brine ingredients.

1 cup or 10oz. kosher salt for every gallon of water

Optional Seasonings
3-4 lemons, halved
10 bay leaves
1/2 cup honey
1 head of garlic, halved crosswise
1/4 cup peppercorns

Stir everything together until the salt has dissolved. If the water is cold, you may need to warm it up to dissolved the salt.

Submerge your bird in the brine overnight or up to 24 hours maximum. Too long in the brine and the chicken will become too salty.

Roast
Preheat oven to 425F. Remove the chicken from the brine, discard the brine, and rinse the chicken inside and out. Pat dry (less water on the chicken means a crispier skin). Stuff the cavity with fresh garlic, lemon halves and a bunch of thyme if desired. Rub the outsides of the chicken with a few tablespoons and add salt and pepper. Using kitchen string, Truss the chicken. Place roughly cut carrots, onions, and potatoes in the bottom of a roasting pan and place the chicken on top, breast up. Roast the chicken for about 1.5 hours or until the temperature of the meat reaches 165F on a meat thermometer. Be careful to insert the thermometer into the flesh of the chicken and not all the way to the bone. The outside should be golden and crispy.
Remove from oven and cover with tin foil. Let rest for 20 min. Slice and serve with the veggies.


                                                       Pesto Pasta Chicken Salad


1 box of whole wheat penne pasta, cooked al dente
1/2 cup basil pesto
3/4 cup frozen peas, thawed
3 green onions, chopped
3 stalks celery, chopped
1 tablespoon mayo, nayonaise (soy mayo), or olive oil
1/4 cup shredded parmesan
All the picked-off leftover roasted chicken (save the carcass)

Mix ingredients together and add seasoning to taste.

Pesto Tip
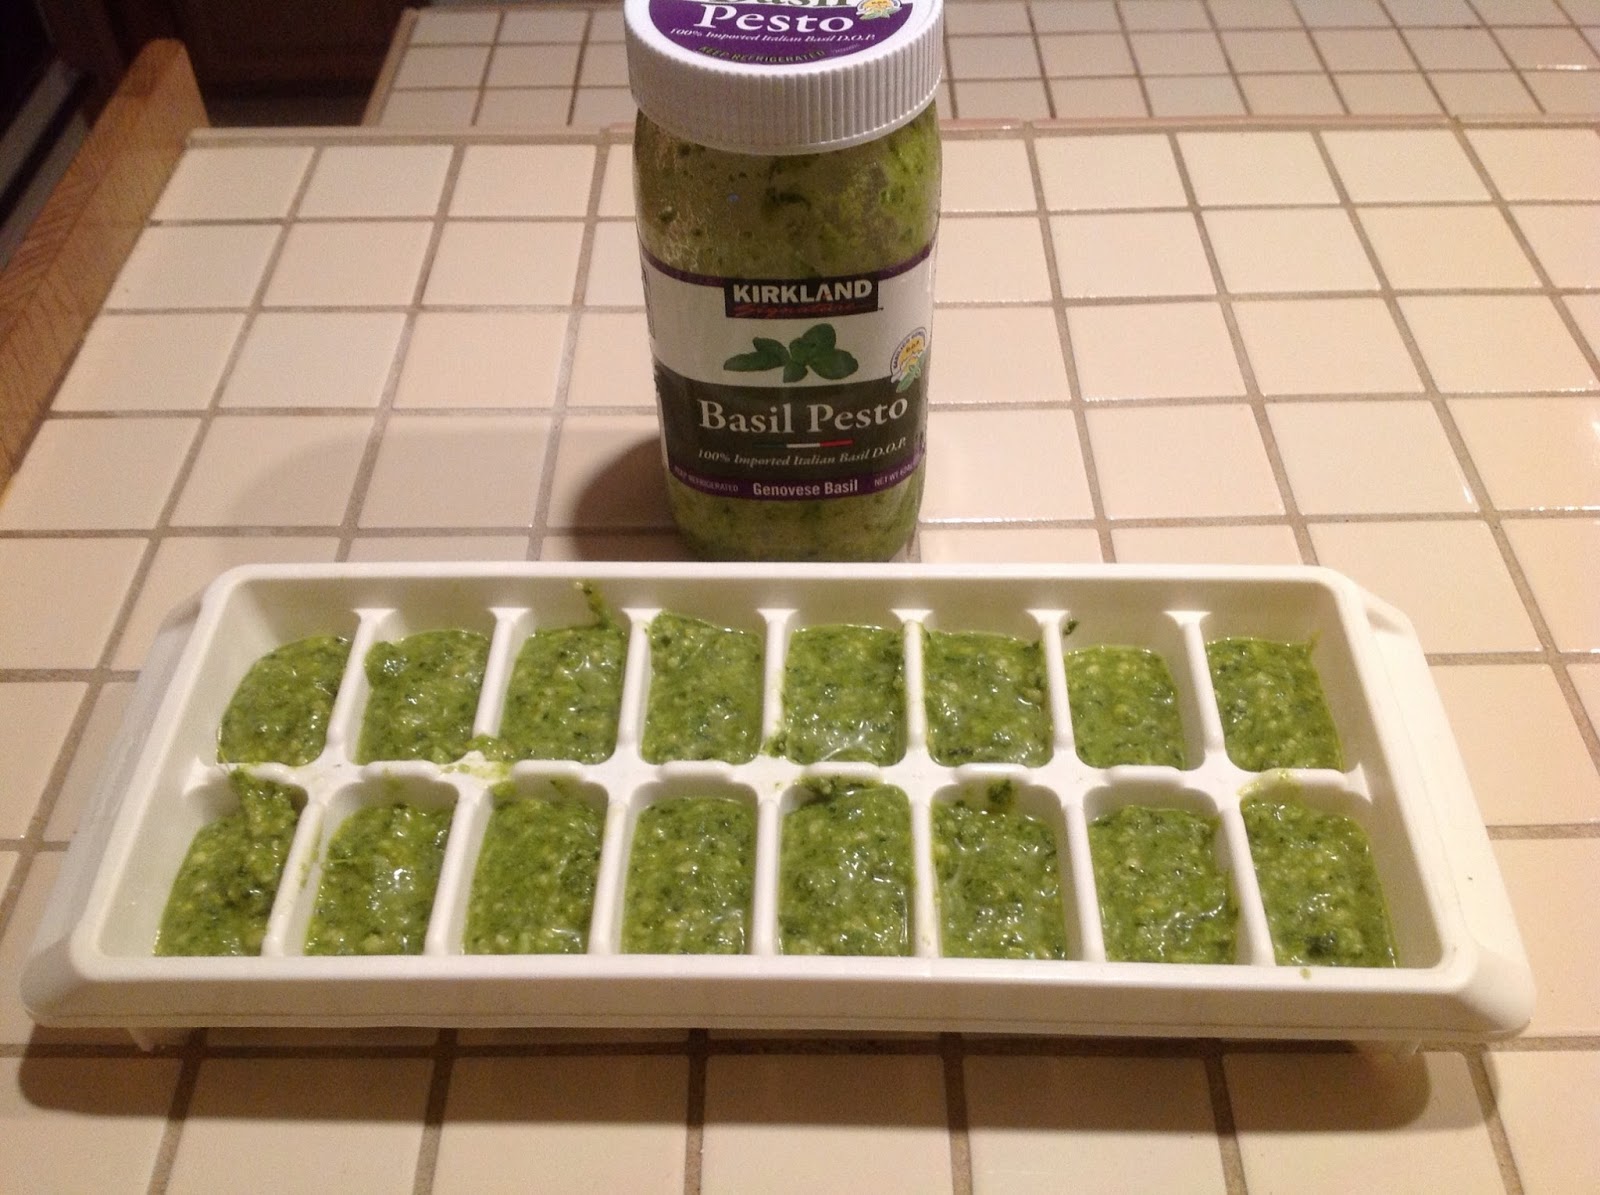
Whether you make your own pesto or score a large jar at Joeten Superstore, storage can be easy. Divide pesto evenly in an ice cube tray and cover well with plastic wrap. Keep it in the freezer and pop out a cube when you need it.


Biscuit Dumpling Soup


Biscuits


1 cup cake flour*
1 cup regular flour
1/2 tablespoon kosher salt
1/2 tablespoon baking powder
1/2 teaspoon baking soda
1 stick unsalted butter, cut into 1/4-inch cubes and chilled
3/4 buttermilk**

Combine the flours, salt, baking powder, and baking soda. Add the chilled butter and mix by hand, until the pieces of butter are no bigger than small peas. Make a well in the center of the flour mixture and pour in the buttermilk. Stir and lift the mixture with a sturdy spoon, gently working the flour into the buttermilk. When the dough has come together in a mass, dust a work surface with flour and and turn out the dough. Divide the dough into 8 or 16 balls (depending of size of dumplings desired). Put aside until ready to use.
*Make cake flour from regular flour by sifting the desired amount through a fine-meshed sieve several times.
** Add a 1/2 tablespoon of white vinegar to milk and let sit for a minute for buttermilk substitute.


Soup
olive oil
1 onion, chopped
1/2 head of garlic, chopped
3-4 stalks celery, chopped
2 large carrots, chopped
Any fresh herbs on hand (thyme, rosemary)
2 quarts homemade stock (see recipe below)


In a large pot, heat some olive oil and all the ingredients except for the stock. Cook well over medium heat until the onions are caramelized and the carrots are almost cooked through. Add the stock, cover and bring to a rolling boil. Add the dumplings, cover and cook for about 20 minutes (for large dumplings), gently stirring halfway through.


Chicken Stock


Put the chicken carcass in a large pot and add, in whole or scraps, carrot, celery and onion ends. Slice a garlic head in half crosswise and throw in some salt and pepper, bay leaves, and dried or fresh herbs (this is great for fresh herbs that have seen better days).

Pour in enough water to cover everything. Put over medium heat and cover. Bring to a boil then lower the heat and simmer slowly for 1 to 2 hours.

Turn off the heat and let cool; strain out the carcass and vegetables. Chill the stock in the refrigerator, spoon off the fat and discard. Freeze or refrigerate the stock until needed.


Friday, 12 July 2013

Good. Local. Cheap.

I've been meaning to write a post featuring nutritious, inexpensive dinner ideas which feature local produce for a while now. Because processed foods (cheese, meat products, cereal, frozen dinners) are often the most expensive on Saipan, assembling cheap, healthy dinners can be cheap and easy if you know where to look.

Aside from the farmers' markets on Tuesday evenings (Garapan Fishing base) and Sabalu Market on Saturday mornings (across from the courthouse), I like to get local produce from Vegetables Plus in Puerto Rico or Saipan Fresh Market in front of Century Hotel in Garapan. Another good place for produce (though maybe not local) is San Jose Mart across from Joeten Superstore. 

 Quinoa Chickpea Burger with Baked Sweet Potato Fries

A mostly locally sourced meal: Quinoa Burger with baked sweet potato fries.

Chickpea Quinoa Veggie Burger

Ingredients
2 cups drained and rinsed canned chickpeas
1 cup cooked quinoa (or brown rice)*
2 cloves garlic, minced
salt and pepper
1 egg
2 tablespoons coconut or olive oil  

Instructions
Mash chickpeas and quinoa until a thick paste forms. Stir in the garlic, salt and pepper. Stir in the egg. Form into four 1/2" thick patties. Heat oil over medium high heat and cook patties for about 4 minutes on each side. 

Top with mustard, mayo, onion and local tomato, lettuce and avocado. I recommend using whole wheat buns from Himawari.

I love mine with tinian hot pepper sauce!

*Joeten Superstore carries 4 lb bags of quinoa for around $15. Joeten Susupe sells a 1 lb bag for around $12. You do the math. Quinoa keeps well and 4 lb of quinoa will make A LOT of meals.


Baked Sweet Potato Fries


Ingredients
4 medium sweet potatoes, cut into wedges
salt and pepper
coconut oil

Instructions
Preheat oven to 400F. Toss the potato wedges in the oil and sprinkle with salt and pepper. Place in one layer on a baking sheet and bake for 35-40 minutes.


Rosemary Chicken with Quinoa Salad and Local Greens


 Quick Rosemary Chicken

Ingredients
4 boneless skinless chicken breasts (I buy frozen in bulk at Joeten Superstore)
1 tablespoon rosemary, finely chopped
olive oil
1 teaspoon each salt and pepper

Instructions
Slice the chicken breasts like a butterfly cut to thin out the chicken breast. Put the chicken breast slices on a large cutting board. Mix the rosemary, salt and pepper and sprinkle over the breast halves. Cover the breast halves with a piece of plastic wrap and beat the chicken with a rolling pin. This beats the flavoring into the meat and thins the meat so it cooks quickly and stays moist. (see photo) 
Heat olive oil in a pan over medium high heat and saute the chicken breast pieces in batches for about 4 minutes on each side. The chicken should cook fairly quickly. Cover chicken and set aside and rest.

Quinoa Salad

Ingredients
1 half local pumpkin, roasted (see recipe below)
2 cups of cooked quinoa
1 half of an avocado, large-chopped
roasted chickpeas (see recipe below)
3 green onions
1 teaspoon crushed red pepper 
olive oil
black pepper

Instructions
Mix all ingredients together and add olive oil and black pepper according to taste.


 Roasted Pumpkin

Ingredients
1 whole local pumpkin (I sometimes roast 2 for extra leftovers)
coconut or olive oil

Instructions
Preheat oven to 350F. Cut pumpkin in half and remove the seeds (Roasted Pumpkin Seeds). Cut the pumpkin into 1-2 inch slices. Rub all cut sides with oil and place in a single layer on a baking sheet (or two baking sheets). Sprinkle with salt and other seasoning if desired. Roast the pumpkin for 45 to 1 hour until lightly browned and soft when pierced with a fork. Remove from oven and let cool. The skin will peel off easily.

Note: This amount of roasting can really heat up the kitchen. I like to do this on a cool(ish) evening right before bed. I also try to bake some sweet potatoes at the same time to have on hand for the week. That way, I only need to heat up the kitchen once. Roasting things like pumpkin and potatoes all at once makes an easy-to-grab food for later.


 Pan-Roasted Chickpeas 

Ingredients
1 can of garbanzo/chickpeas
coconut oil
 3-4 peeled garlic cloves (or more if you're feeling saucy)
salt and pepper
powdered tinian hot pepper

Instructions
Rinse and lay beans in an even layer on a clean towel for about 20 minutes to help them dry. Heat some oil in a pan over medium-high heat and when the oil is hot, add the garlic cloves. Let the cloves brown on each side for a couple of minutes and add the chickpeas. Shake them in the pan occasionally and let them get really brown and crunchy. This takes about 10-15 minutes. 

Season to taste though you may not need much salt as canned beans are already packed with sodium.


  Stir-fried Local Greens with Garlic

 Ingredients

2-3 tablespoons olive or coconut oil
3 cloves garlic, sliced
6 cups local greens (bok choy, kang kung, mustard greens, other hardy greens)
salt and pepper
1 half of a local lemon

Instructions
In a large pan, heat oil over medium high heat. Add garlic and brown. 
Add greens and quickly sear them for a couple of minutes. Sprinkle with lemon juice. Season to taste.


How do you use local produce? Post a comment or leave a recipe in Recipe Share!

Wednesday, 10 July 2013

Clafouti-sy


I just found my new last minute dessert in the French dish, clafoutis. The texture is somewhere between cake and custard and, though it was originally meant to include black cherries, works well with many different kinds of fruit. I used thawed frozen blueberries for the clafoutis in the picture though any kind of berry would be awesome. I also plan to try mangos and soursop, as both of these local fruits go great with sweet dairy.

Clafoutis is unique, delicious and easy to throw together last minute with simple instructions and basic ingredients. It's also great as a breakfast food.

I have tried two different recipes for clafoutis and prefer the cakier texture of Julia Childs's. If you are looking for a custardy version, add less flour and more cream or milk. Below is the adapted version of Julia Childs's sour cherry clafoutis.

Clafoutis 

1 1/4 cups cream (or milk for a lighter version)
2/3 sugar, divided (or less depending on type of fruit used)
3 eggs
1 tablespoon vanilla
1/8 teaspoon salt
1/2 cup flour
2 cups fruit (any type of berry, soursop, mango)

Preheat oven to 350F.
Whisk together the cream (or milk), 1/3 cup of sugar, eggs, vanilla, salt and flour. Lightly butter an 8-cup baking dish (a large pie pan works). Pour 1/4 inch of batter into the dish and bake for 10 minutes. While that is baking, add up to 1/3 cup of sugar to whatever kind of fruit you are using. I used thawed-out frozen blueberries which only needed a few tablespoons of sugar. Berries like mulberries or tart raspberries may need a little more sugar. Soursop or mango is probably sweet enough already.
After the ten minutes, remove the pan from the oven and distribute the fruit on top. Then pour remaining batter slowly so as not to displace the fruit.
Bake for 45-50 minutes, until the clafoutis is puffed and brown and a knife in the center comes out clean.
Sprinkle with powdered sugar if desired and serve warm.
Voila!


Tuesday, 11 June 2013

Taro Treat


Boiled or steamed taro just doesn't float my boat. The lump of soft, white starch on the plate just makes me wish it was a potato. I have been looking for tasty ways to use taro because taro is cheap and can be found year round on Saipan. I found this taro chip recipe and was pleasantly surprised. I didn't think baking them would make them so crispy, but they turned out great. I substituted coconut oil for olive oil and I think coconut oil brings out a great flavor. Awesome with any dip like hummus or with poki, but they taste the best when I sneak them into the movie theater. 


Ingredients

4-5 medium-sized taro roots
coconut oil (or other oil)
salt or other seasoning

Preheat oven to 400 degrees F. 

Using a carrot peeler, remove the thin brown peel on the taro. Using a mandolin, or a very sharp knife and steady hand, slice the taro into thin, uniform slices. Brush oil on both sides of each slice and arrange in an even layer on a baking sheet. Bake for about 20 minutes or until they become golden brown. Careful! They burn quickly.  Season and allow to cool. Store in an airtight container to protect them from the soggifying humidity. Your days are numbered stale, fluorescent yellow movie theater popcorn! (Probably not though. Everyone loves that stuff.)

Note: It's very important that the slices are uniform or you will end up with some soggy and some burnt.


Wednesday, 8 May 2013

Beginner Dinner in Under 30 Minutes: Chicken Parmesan

Even for seasoned home cooks, preparing a complete dinner every night can be a bother. Here are some tips that help me get food on the table quick. 

#1 Plan Ahead- I can't express how important it is to organize your grocery list and plan meals for the week. Put together a menu of 5 meals and add the ingredients to your weekly grocery list. Having everything on-hand for dinner gets you halfway, and having a menu planned can keep you from hitting a "frozen pizza night" road block.


#2 Go Meatless- It doesn't hurt to skip the meat some nights as meat only takes longer to cook and, usually on Saipan, it's frozen and needs to thaw. Keep your meals hearty and satisfying by replacing meat with quicker-to-cook animal products like eggs or cheese, vegetable fats such as avocado (in season now!), or complex carbohydrates such as sweet potato, taro, quinoa or beans.


#3 Prep- When I have time in the morning, I sometimes chop vegetables or prep other pieces of my plan for dinner that night. Sometimes while making dinner, I will make a large portion of a side dish, such as mashed potatoes, quinoa, or pasta and use it for two dinners.


#4 Make it a Priority- If it isn't important to you, it probably won't happen. Eating meals at home are often much healthier and much cheaper than eating out. Meals are important. Treat them that way.


Quick and Easy Chicken Parmesan Dinner 


Chicken parmesan with spinach salad and whole-wheat pasta.
These portions made two dinners, but the ingredients can easily be doubled.

Ingredients

Salad

2 handfuls of spinach (carried regularly at Joeten Susupe)
8 local cherry tomatoes, halved
1/2 local avocado, sliced
olive oil
salt and pepper

Pasta

4 oz. whole wheat pasta (any kind)
Pasta sauce, canned or homemade

Chicken Parm

1 boneless, skinless chicken breast, thawed
1 handful shredded mozzarella or 2 slices havarti cheese
1 small handful parmesan, shredded or grated
pasta sauce
1 egg
1 handful flour
1 handful panko (Japanese breadcrumbs)
Heat-stable oil: grapeseed, sunflower, coconut (may change the flavor of the dish slightly)
Dried Italian Seasoning (optional)

Fill a medium saucepan with water and place, covered, on the stove over medium-low heat.

Meanwhile, slice the chicken breast into half of its thickness. Now you should have two thin chicken breasts pieces. Using a meat tenderizer or rolling pin, hammer the chicken pieces so they are thin and even.
Crack the egg into a small bowl and mix it a bit.
Place the handful of flour on a plate.
Place the handful of panko on another plate. Add the italian seasoning if using.
When the water on the stove is boiling, add the pasta and cover. Turn off the heat and let the pasta sit and cook for 10 minutes.
Dredge one chicken breast piece in the flour to coat. Next, dunk and flip the floured chicken in the egg and then in the panko so the breast piece is coated in panko. Repeat for the second piece.
Ready for frying
In a large frying pan, pour enough oil to coat the bottom and place over medium heat. When the oil is hot, carefully add the chicken pieces. After about 4-5 minutes, or until browned on the bottom, flip and top with a couple of spoonfuls of pasta sauce. Then divide the mozzarella or havarti and the mozzarella between the two pieces. Lower the heat, cover and let the cheese melt on top.


Brown it


Sauce it
  
Melty cheese it


While the cheese is melting, drain the pasta, mix with pasta sauce and top with parmesan and divide between two plates. On the plates, arrange spinach, avocado and tomatoes and top with a small amount of olive oil and salt and pepper. Remove the chicken from the pan and let drain on a paper towel for about 30 seconds before adding to the plates. Ta da! 


Monday, 22 April 2013

DIY Pickles


As with many things on Saipan, sometimes it's best to do it yourself. This is especially true with pickled vegetables, which, when purchased commercially, are often devoid of the healthy bacteria found in traditionally fermented foods. Pickles are also imported, so it is much cheaper to make them using ingredients you can find locally. Though pickled vegetables shouldn't replace fresh in your diet, using home-fermented pickled vegetables are a better choice as they have the added benefit of vitamins and bacteria acquired during the fermentation process. Also, making two quarts costs only about $3 if you already have jars.

don't why, with the glut of cucumbers on this island, I don't make pickles more often.  After acquiring a ridiculously huge bunch of fresh dill at market, I decided it was time to put some cucumbers to work. Instead of canning my pickles, I made only 2 quarts and kept them in the fridge after fermentation, knowing that we will go through them fast enough (especially if I start making grilled cheese regularly for the husband unit). I think the canning process probably kills off some of the vitamins and bacteria we want to keep anyway. Though, if you have A LOT of cucumbers to preserve, see the Papaya Project post for information on canning and check out the USDA's recommendations to ensure safe canning.

I want to be perfectly clear that I did leave my pickles out, covered but uncanned, in the cabinet for 3 days to let them ferment naturally before slowing down the process through refrigeration. The process of fermentation is safe when done correctly, but if your pickles smell rotten, they probably are. Don't eat them. In the Saipan climate, fermentation happens very quickly, so really three days was all it took to transform the cucumbers into lovely pickle butterflies. I have made three batches of safe, delicious, good bacteria pickles using this method. I have never had problems with the pickles going bad, so you shouldn't either.


Ingredients for 2, 1-quart jars of pickles:
1 bag of cucumbers from farmer's market (about 8-10 cucumbers)
4-6 cloves garlic, peeled
4 sprigs of fresh dill (has been available regularly at farmer's market)
1 quart water
1/2 cup white vinegar
1/6 cup sea salt

Directions:

Sanitize jars and lids with soap and hot water. Warm the water and vinegar and stir in the salt until dissolved. Wash cucumbers and cut off the ends. (The blossom end can contain an enzyme which will make them soggy). Cut them into wedges lengthwise or, if you want sandwich pickles, slice thinly crosswise or lengthwise. Put two or three cloves of garlic in the bottom of each jar along with a sprig of fresh dill. Be careful not to add too much dill. There IS such a thing as too much dill. Tilt the jar at an angle and pack the cucumber wedges in to fit as many as you can. You may need to cut some down to size to fit. Pour the water solution over the cucumbers to cover and leave about 1/2 inch open at the top. Because of the fermentation process, the liquid will bubble and spill out of the jar if the level is too high. The cucumbers may begin to lose their green color immediately; this is ok. Add an extra sprig of dill to each jar and lightly twist on the lids. You want some air to be able to escape as fermentation takes over. Put the jars on a towel in a dark, cool cabinet for about three days. Check on them everyday to release air and when you are happy with how they taste, put them in the fridge to stop fermentation.

Presto pickles!


Note: Because of the heavy salt content of the brine, pickles are very high in sodium. Enjoy in moderation.


Tuesday, 26 March 2013

My Soapbox: Sabalu Market "Haul"

After moving away from Saipan for 6 short months, I've landed back on Saipan and am anxious to take advantage of the growing local farming industry and the diversity of products that has hit Sabalu Market. Today's farmer's market is a far cry from my first visit to the market 2 1/2 years ago where my home cook hubris was stunted by the uniform vendor offerings of foreign brown and green shapes.

In light of the growing number of "shopping haul" videos which are posted to show off recent purchases to the youtube world, I decided to write a market haul post. I won't bore you with a video showing off the veg, but I will describe some of the great produce you see below.  I also wanted to further express my love for buying local produce at the Saturday morning Sabalu Farmers Market so, coming this week and next, I will post recipes of how I am using the goods from my haul. 

Market produce now includes familiar herbs such as mint, dill, basil, parsley and fennel. Fresh varied types of lettuce and greens are also a welcome addition.


This is $15 at Sabalu Market
This is $15 at a grocery store


My market haul:
a large bunch of tangerines
48 oz. of fresh, raw coconut water
1 large papaya
1 huge bag of tomatoes
3 purple sweet potatoes
4 chesa fruits
1 large bag of fresh, shredded coconut
1 bag of eggplant
1 huge bag of cucumbers
1 large bunch of fresh dill
1 bunch of fresh mint
1 bunch of bananas
1 bunch of shallots

What do I plan to do with these goodies?

Chocolate coconut granola 
Perfect coconut pancakes 
Victory pasta 
Dill Pickles 
Tangerine Mojitos 
Macaroni and Chesa (Failed experiment)
Sweet potato wedges 

Money doesn't grow on trees in the CNMI, but healthy food does. How is it that, according to the CNMI legislature, "the CNMI ranked third in the world for the prevalence of type II diabetes"? Unlike the "urban food deserts" of the mainland, healthy and affordable food is within walking distance for most people, so how does it happen that about 50% of children and 70% of adults are overweight or obese in the CNMI? These are problems that I think can be changed by the Saipan consumer. Eat local to reduce obesity rates and support local businesses.

The difference between grocery store shopping and market shopping is clear, yet many people continue to eat mostly expensive, imported, preserved food. Though using fresh, raw materials in food preparation does take a little more work and time, the monetary and health benefits are worth the effort. I hope the types of food products consumed on Saipan will shift with greater and more reliable availability of produce with a farmer's coop. Combining nutrition education with nutrition application is also an important step in bridging the problem to the answer.

What do you do with your farmer's market haul?
Please share your thoughts and recipes!

Tuesday, 20 November 2012

Chicken Salad: Beginner Cook Edition


As requested, here is my take on a simple and nutritious dish.

Chicken salad can take many forms and the only three ingredients that come standard in any chicken salad from my kitchen are shredded chicken, celery and mayo (or substitute such as non-fat plain greek yogurt, nayonaise* or some combination thereof). From there I like to fill in the blanks with either a) whatever I have on hand or b) a "flavor profile" that I am craving.
An easy way to make sure flavors go together is by choosing a food ethnicity and using ingredients common in that type of food. Hundreds of years of cooks from all over the world have assembled these nice "cultural flavor profiles", so why not use them? Especially for beginner cooks, reference your favorite food region and mimic those flavors in your chicken salad.

For example, if you like mexican food, add:
chopped tomatoes
green onion
chopped cilantro
tinian hot pepper
corn
raw chopped chayote
black beans
avocado
ground cumin
squeeze of lime
You could grill the chicken

Moroccan/North African:
chopped fresh mint
chopped parsley
squeeze of lemon
good black olives, pitted and chopped
a pinch of cinnamon
chili powder
chickpeas
yogurt
shredded carrot
chopped almonds

Indian:
cook chicken with crushed green cardamom pods (remove pods after cooking)
tumeric
cumin
some kind of hot pepper
saffron
a pinch of cinnamon
chili powder
yogurt
or, if your feeling daring, garam masala

Thai:
very finely sliced or grated lemongrass
green onion
peanuts
hot pepper
grated ginger
cook the chicken in coconut milk
squeeze of lime
cucumber

If you wanted to get crazy, you could make (or buy) Tom Kha Gai soup and use the chicken and some of the broth to add to your own shredded chicken, celery and chopped cucumber. I haven't tried this, but it would be a good way to add difficult thai flavors like lime leaves and galangal.

Anway, I could go on and on about chicken salad options, but here is the one that I usually end up making because it is tasty and my husband doesn't like "ethnic" food, whatever that means. I adapted this recipe from Gwyneth Paltrow's website, Goop.com, using flexible, Saipan-friendly ingredients.

goop.com

The Saipan, it's not Kelaguen, Chicken Salad

**2 1/2 cups cooked shredded chicken, pan-cooked, roasted or grilled (this is a good recipe for any leftover chicken you have)
3-4 stalks celery, chopped
1/3 cup chopped walnuts or any kind of nuts you have on-hand
4-5 green onions, chopped or 1/2 red onion, thinly sliced
Juice of 1/2 lime
1/3 cup chicory or kang kung or broccoli rabe, chopped
1/4 cup halved grapes, any kind dried fruit or fresh apple or pear, chopped
1/2 cup mayo, nayonaise, greek non-fat yogurt (or some combination of these)

Stir everything together and season with salt and pepper to taste. Feel free to adjust the amounts according to your taste.

Let me know how your version turns out!


*Nayonaise is a low-fat, vegan, soy-based alternative to mayo that tastes more like Miracle Whip. Surprisingly, this can be found at Joeten Susupe in the mayo/dressing aisle. I usually mix nayonaise with either some real mayo or non-fat greek yogurt because I don't like the taste of Miracle Whip, but want to cut down on the fat of mayo. When I am in the U.S. and can get it, I go for Vegenaise because it has better nutrition than mayo and tastes amazing (though it is not low-fat).

** There are many ways to cook a chicken! If you have leftover roast chicken, grilled chicken (or Thanksgiving Turkey!), pick the meat off the bones and throw it in the salad. If you want to use chicken breasts, I recommend buying the individually wrapped ones in bulk from the freezer section of Joeten Superstore. Here is a good guide to different cooking methods. Don't worry too much about getting a meat thermometer just for chicken breasts. As long as there is no pink, it's done!


Saturday, 27 October 2012

Greens, greens the magical fruit?


I have been craving a hearty salad -- not sad romaine shipped from Cali...not oldy spinach also from far away but something fresh.  I bought seeds to plant some micro greens but in the meantime, I thought I would try a few of the local greens raw, a suggestion from my dear mother.  When it comes to raw greens, of course the younger the better and if you are not used to this much roughage in your diet, I strongly advise mixing it with local lettuce or sad romaine from Cali.  Unless you are already on a raw diet--- very hard to do in Saipan ---some raw greens will surely clean you out. So get roughage ready for a short amateur greens lesson and then a tasty salad.

These greens (above) are a close relative or the same (Michelle thought it was different I thought it was the same) as what I have alternately known as gai lan, chinese broccoli or broccoli rabe. It's not always available here, but it is one of my favorite greens cooked so I pick it up whenever I see it. (I like to simply sautee in garlic and olive oil and then put oyster sauce when just cooked)
 
I like it raw, but in small quantitities. Strong mustard greens flavor and slight bitterness are not for the faint of heart.


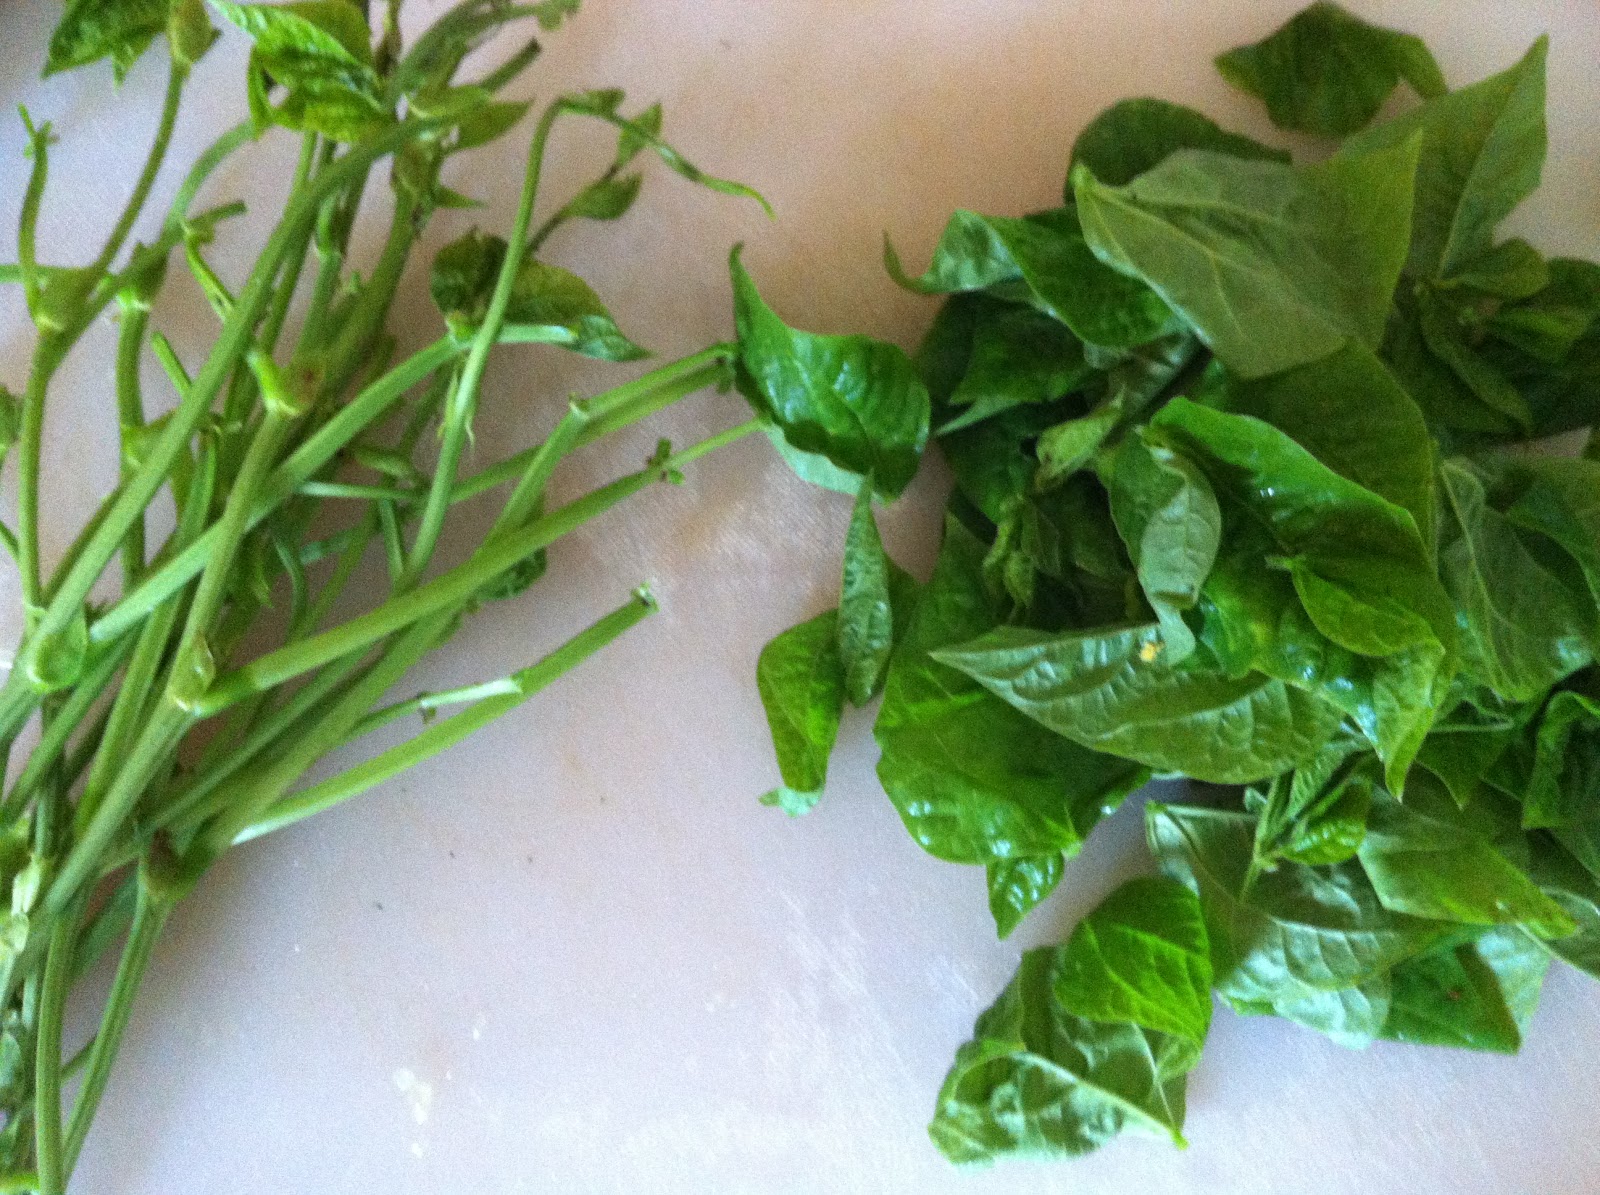
These greens (above) are the leafy part of a green bean plant. They have a slightly fuzzy texture. It has a very pleasant light green bean flavor and I though it was tasty raw and cooked. (I sauteed some to put on pizza the day after salad day). The stems are hard and I found them be too woody to eat.


These greens (above) are widely available in Saipan and taste to me like baby bok choy or similar also known here by various other names. This is the most delicate of the three and easy on stomach raw-- I throw some in a salad regularly.
 

Saipan Shrimp Salad

 
Take the leaves off each kind of green you are using and wash thoroughly. Set stems aside (not for green bean greens but for the others) to use in soups stir fry or whatever later. Use a salad spinner to dry or if you don't have one, set aside and allow to drain while you deal with shrimp.
 
 
Prepare shrimp. Devein and remove heads, freeze the heads in a ziploc to make stock out of later.
 These beauties are from same local shrimp farm that normally comes to the farmers markets (you can get during the week often at XO market on middle road in the produce section) They were out of the smaller ones -- big ones are just as sweet bigger and more expensive.
 
 
Prepare shrimp marinade which consists of minced garlic, lemon grass, salt, pepper, fresh local citrus of your choice, fresh green chili, red chili flake and a little soy sauce or fish sauce. Mix marinade into deveined shrimp and refrigerate.
 
 
Prepare dressing from citrus, olive oil, salt, pepper, sugar, fish sauce and chili. As hot or mild as you prefer.
 
Section citrus. I used very sweet local tangerines. I got them from two different vendors because I never know which ones will be sweet and sometimes they are sour. This time the smaller ones were super sweet. You could use pomelo. If pomelo or grapefruit is used I would section it properly so there was no skin, but with the little tangerines didn't seem necessary.


Sautee shrimp in a little olive oil or pan spray until garlic done and shrimp turn barely pink.
 
Chop greens, put in serving bowl and add in whatever else you like, romaine cucumber, or whatever.
 
Add chopped basil.
 
Toss salad in vinagrettte.
 
Arrange shrimp on top.  
 
 
ENJOY!!!


Sunday, 23 September 2012

Skipjack yum . . .

Thanks Michelle Dong Photograph for making my ugly fish look beautiful!!


One of the things I love about cooking and eating in Saipan is fresh local fish--raw, cooked, keluguen ceviched-- I love it all.  I'm from California, and have been missing  fresh cali-style tacos so fish tacos seemed a perfect choice for my first blog entry. I have been scoping out Mexican ingredients on island for months, in preparation for making good on my promise to some fellow Californians to make them tacos. At long last . . . TACO NIGHT 1.0.

Saturday morning I went to the fish vendors right accross the street from the courthouse on beach road, with cash in hand, ready to make a good taco choice.  I have been hearing that skipjack is a great grilling fish, and there was one about the right size that was caught that morning, so I decided to give it a try.  Ugly looking thing, but delicious.


This fish is pretty tricky to fillet compared with a tuna or salmon because of the hard exo-spiney thing running along the tailside and the size of the spine itself.  You do not have to gut or scale the fish. Using a sharp knife, crack through the spiney part just above the tail. Because the spine is large, I filleted each side of the spine, seperately working the fillet knife from outside in on both sides before seperating the fish completely off the spine from the top of the spine near the head. Cut off the skin with fillet knife and cut out the bones and bloodline, so you end up with four fillets  Save head and spine for stock if you wish.  My knife skills are amateur at best so after I filleted I sliced off the rest of the good head bits, carved out the cheeks and other shavings from near the spine to make a little ceviche. (see ceviche recipe below)


Fish Taco Marinade 

garlic finely chopped (about 7-10cloves)
fresh local green chilies finely chopped (about 4)
mild dark chili powder (liberal sprinkle)
ground cumin (liberal sprinkle)
salt
pepper
local lime/lemon/tangerine squeezed (about 3)
olive oil (drizzle)
 
I started out with a five pound fish, and used an amount of the above ingredients that looks about like the picture below.
 
 
Allow to marinate in the referigerator from 20 minutes to about 2 hours, turning to mix it up at least once.
 
Using a fish basket, (I got mine at Ace for between 7 and 8 bucks) grill on high temperature until fish barely looses translucency.  Flake into chunks with your hands or a fork.
 
Skipjack is a mild tastting white fish, with a good amount of fat, soft compared to mahi, but still holds up well on the grill. (sorry no grill pic, the food smelled so good we forgot to take one!)
  
Michelle Dong Photography
  
Serve with homemade tortillas (or buy stale ones imported from Cali if you must) warmed on the grill and your favorite Mexican condiments!
 
Michelle Dong Photography

fish taco foreground, carne asada background.
Shout out to Elhaje for Tinian spicy black and pinto mix slow-cooked beans.
 

 --Enjoy --
 

Skipjack Ceviche

 
I ended up with about 4-5 ounces of fishscrap pieces after filleting and made a little appetizer with it.
 
  1. remove any bone or bloodline and cut any larger scraps to bitesize.
  2. in a cup/bowl/tupperware add enough local lime/lemon juice to cover (about 2 for 4 oz fish)
  3. add chopped fresh chili, green, red whatever to taste(I used long skinny green ones)
  4. minced red onion
  5. tapatio or other Mexican hotsauce to taste
  6. chopped cilatro, or basil
  7. salt to taste
  8. cover and refrigerate 30 minutes
  9. serve alone or with tortilla chips
No taco dinner is complete without copious quantities of margeritas!! Shout out to Guidotti for mad shaker skills!
 
Michelle Dong Photography